Would you like to transfer an existing project from another platform such as GitHub, or transfer a project from the openCode GitLab instance to another platform (e.g., GitHub, Gitea)? This is referred to as mirroring. There are three methods for doing this:
| Method | Description |
|---|---|
| Push | Mirroring a project from the openCode GitLab instance to another location |
| Pull | Mirroring a project from another location to the openCode GitLab instance |
| Bidirektional | Mirroring in two directions |
How push mirroring works
Mirroring involves transferring a project from the openCode GitLab instance to another platform (e.g., GitHub, Gitea). This requires maintainer rights for the project on openCode. The target project (e.g., on GitHub) should already exist. With push mirroring, the source (openCode GitLab instance) actively sends changes to the target (GitHub, Gitea, etc.).
1. Copy the target URL
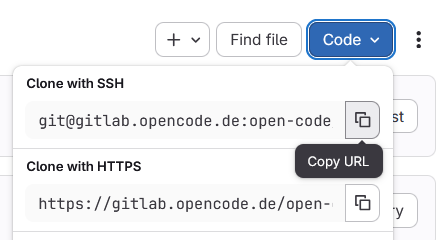
Open the target project (e.g., on GitHub or GitLab) and click on the “Code” button (in GitLab it is blue, in GitHub it is green). In GitHub, select the SSH tab and copy the URL displayed there. In GitLab, select “Clone with SSH” to copy the URL.
Copy URL from GitHub:

Copy URL from GitLab:
2. Set up mirroring
In your openCode project, go to Settings > Repository. Scroll down to “Mirroring repositories” and click “Add.” Paste the URL you just copied and adjust it as follows:
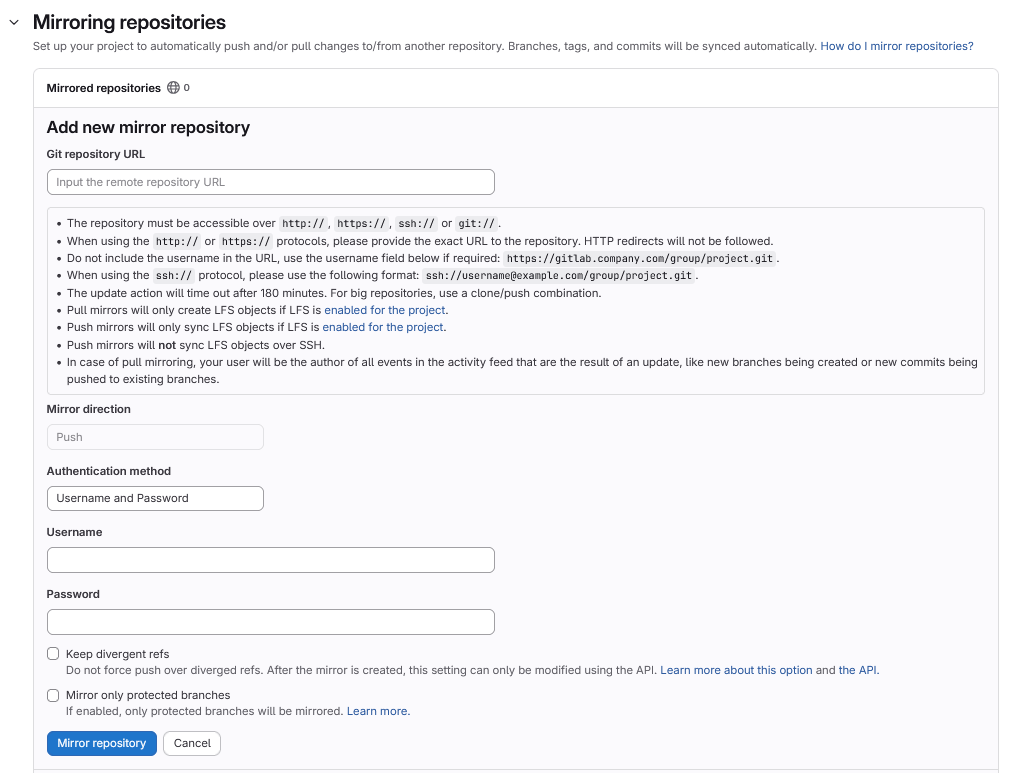
- Add ssh:// before the URL and replace the colon (:) before the project name with a slash (/).
- Select “Public SSH Key” as the authentication method.
- Set the username to “git.”
- Click “Mirror Repository.”
3. Add SSH key
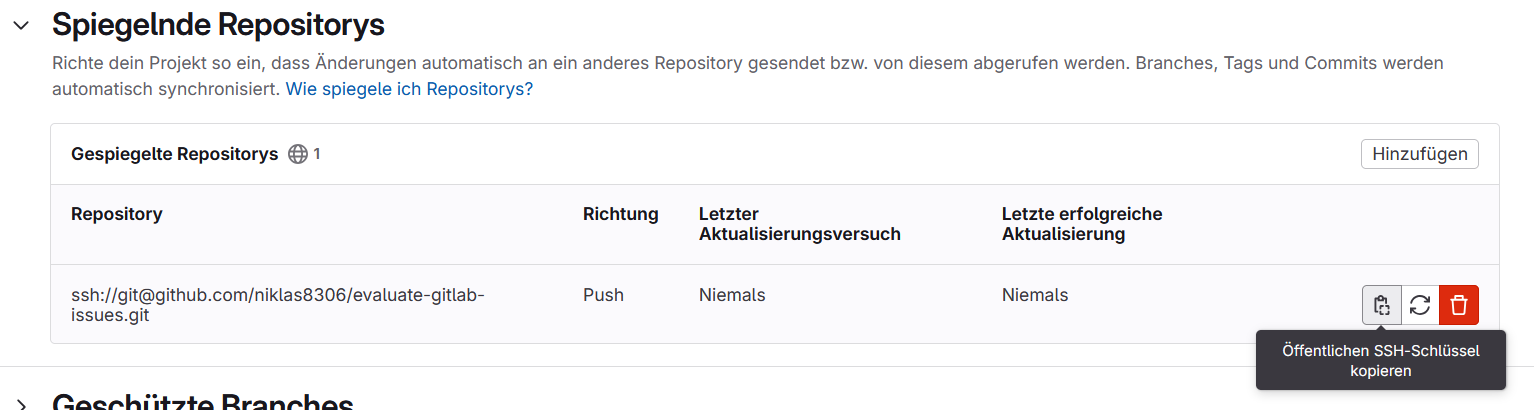
Copy the public SSH key displayed and paste it into the target project as the “Deploy Key.”
To do this, open the page of your empty GitLab project on GitLab and navigate to Settings > Repository. Open the Deployment Keys tab and click on the “Add New Key” button. Now paste the key from the clipboard and choose a meaningful title for your key.
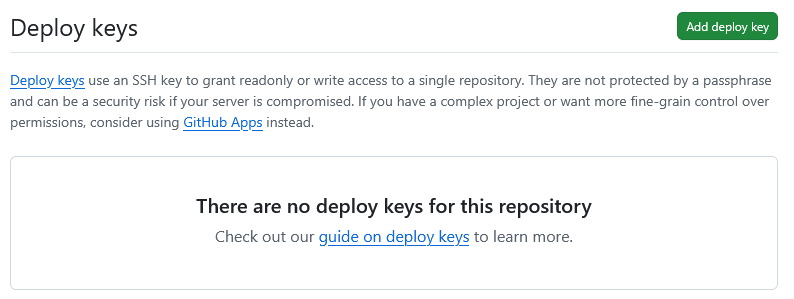
On GitHub, open the page for your empty GitHub project. Click the Settings button in the top right corner and navigate to Security > Deploy Keys in the left sidebar. Confirm Add deploy key, paste the key from the clipboard, and assign a meaningful name here as well.
How pull mirroring works
The openCode GitLab does not currently allow automatic pull mirroring (mirroring a project from another location to the openCode GitLab instance) via the interface. With pull mirroring, the target initiates synchronization. It regularly queries the source for changes.
However, there is an alternative: implementation via CI/CD pipelines is possible, but requires advanced knowledge. The target (the openCode GitLab instance) starts a pipeline. This pipeline loads the data from the source (e.g., GitHub, Gitea, etc.) into a temporary environment. From there, it is pushed back to the target repository.
In this guide, the projekte to be synchronized are referred to as follows:
- Source project: The Git project from which the updates are to be pulled, e.g., on GitHub
- Target project: The Git project on openCode to which the updates are to be applied. The CI/CD configuration is also set here via the
.gitlab-c.ymlfile.
1. Create target project
Create an empty target project on the openCode GitLab instance. Create a new branch in this project. If the project has already been imported (e.g., from GitHub), use this repository with a new branch.
Now create the following GitLab CI script (.gitlab-ci.yml) on the newly created branch. Adjust the link of the target project under #Clone only main from GitHubwith the URL of the source project:
You can adjust the target project to be cloned using the TARGET_REPO variable.
2. Enable access to the source project
On the GitLab page of the source project, navigate to Settings > Access Tokens. Create a new access token using the Add new token button:
- Assign a meaningful token name and make a note of this exact name (or save it in a password manager).
- Select the role
Developer. - Select the following scopes:
write_repository,read repository. - Confirm the creation of a new project access token by clicking the (blue) “Create project access token” button.
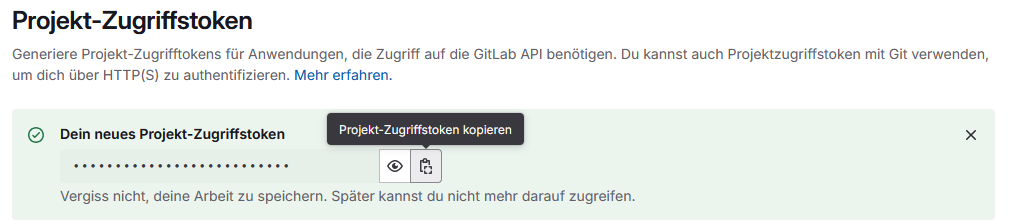
Then, on the page that has now opened, copy the newly created access token to the clipboard using the Copy project access token button (or save it in a password manager):
Add the created access token to the CI/CD variables:
- Now navigate to Settings > CI/CD in the navigation bar (on the left).
- Open the Variables tab.
- Click on the Add variable button.
- Now enter the value
GITLAB_PATin the Key field. - Add the access token from the clipboard (or password manager) from step 3 to the Value field (make sure that no new empty line is added at the end of the code).
- Now click on the Add Variable button.
Add the variable with the key GITLAB_PAT_NAME and the name of the access token from step 2 to the CI/CD variables.
3. Set up regular synchronization
- On the GitLab project page, open Build > Pipeline Schedules.
- Click the (blue) Create a new pipeline schedule button.
- Enter a meaningful description for the pipeline schedule and select an interval pattern. Create the new pipeline schedule using the corresponding (blue) button.
4. Verify that CI/CD is successful
Open the Build > Pipeline tab in the target project. The results of the pipeline can be viewed there. Click on the pipeline to see if the synchronization was successful.